Sunday, 30 September 2018

September - DIY Upcycled Pencil Holders

A while ago now, I saw an idea for marble effect pencil holders on Pinterest. I've adapted it a bit by adding foam as a base on the inside (so that it doesn't bang when you put things in it) and as a rim around the top so that you don't get cut by any little sharp edges.


You will need:
2 x food tins (thoroughly cleaned)
Foam (black for the base + another colour to match whatever self-adhesive you choose)
Self-adhesive marble effect (or other self-adhesive to your taste)
Ruler
Pencil
Scissors
Double sided tape


I started by pressing the tins into the foam. I then measured the diameter (you'll need this later) and cut out the circles.


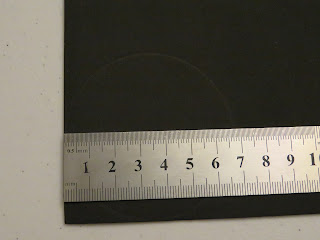
To make the foam rims, I used a ruler to measure the distance between the top of the tin and a bit below the sharp edges (on my tins 1.5 cm). I then marked 1.5cm and 3cm from the short edge of the foam and cut two strips. I created a ring with the foam and put it inside the top of the tin then marked and cut off any excess. I put a strip of double sided tape along the whole foam rim and carefully stuck the foam to the tin.


I then put an 'X' of double sided tape on the back of the foam base and stuck it inside the tin, carefully pushing out any air from the centre to the edge.


I then measured the height of the tins and marked it on the paper side of the self-adhesive marble.

To work out the circumference of the tins, I cheated a bit and used Google - all I had to do was type in the radius (half the diameter). The diameter of my tins was 6.75cm so the radius was 3.375cm which gave a circumference of 21.21cm - I rounded it up to 21.3, to make sure I wouldn't have any gaps. I then marked 21.3cm on the paper side too, and cut out the two pieces.

I peeled back about 5cm of the paper and carefully lined up the corners of one of the short ends with the top and bottom of the tin. Then I slowly pressed a section of the marble to stick it to the tin and peeled back more paper and repeated until the whole tin was covered. Repeat for other tin.


And there you have it! Two marble effect pencil holders ready to use!


If any of you try this, please leave a comment below to let me know how you got on...


August - More Local Ruins

In August, I went exploring some more local ruins including Buckholm Tower, Whytbank Tower and (even though we already knew about it) Elibank Castle.

I did these paintings on 18 x 24cm canvas boards, like Torwoodlee Tower, so that I could scan them and make "postcards". I used Inktense pencils and water-brushes to add the colour and grass and tree textures. Then I used a fine-liner pen to add the detail to the bricks/walls and fences, and to define the edges of the ruins and trees.

Buckholm Tower

Buckholm Tower
18 x 24cm
I first saw Buckholm Tower from across the valley as we were going in to Galashiels and at that point, I didn't know which ruin it was.

I really like the fences in this painting because I think they help lead your eye up to the Tower itself. I also think the trees/bushes are quite effective.


Whytbank Tower

Whytbank Tower
18 x 24cm
Whytbank Tower was restored fairly recently but it is surrounded by ruins of the rest of the "settlement". The gardens here are well kept and had some beautiful flowers.

I think the painting turned out really well, especially the trees and ruined buildings in the foreground. I also like the sky and the variation in the blue around the clouds.


Elibank Castle

Elibank Castle
18 x 24cm
Elibank Castle was one of the first long walks we did as a family when we moved to Scotland. I only recently learned the history of it though - there is quite a funny story about "Muckle Mouthed Meg"!

I think the texture I got into the grass/bracken is quite effective and helps add some depth to the painting. I also tried to put in a few foxgloves to add a bit of interest to the foreground.


Please leave a comment below to let me know what you think or to vote on your favourite...


Saturday, 29 September 2018

July - Summer Church Painting

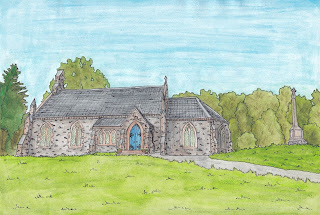
Over the last two years, I've been slowly doing 4 seasonal paintings of Caddonfoot Church and I finished the fourth one in July. I did them in a bit of an odd order as I started with Winter, then did Spring, then Autumn and finally Summer. I did all of these paintings on paper, using Inktense pencils, water-brushes and then fine-liner.


Please leave a comment below to let me know what you think or to vote on your favourite...


June - Torwoodlee Tower

I've always been interested in ruins and decided to look at the local map to see which ruins, if any, were in the area. To my surprise, I discovered there were several in the area. A friend recommended Torwoodlee Tower, so I decided to go there first.

First sight of the tower
The day I went was beautifully sunny which showed the colours at their best. Along the path, I saw a beautiful Orange-tip Butterfly and it landed long enough for me to take quite a close-up photo:


I was pleasantly surprised to find that the groundsman cut the grass regularly which made access much easier. There was also an information board with some interesting history on the tower:

(Click picture to enlarge)


This tower dates back to 1601 and much of it is still standing. I decided to use this opportunity to take a variety of photographs for reference when I got home.


I took about 50 photos on this trip so when I got home, I went through them and decided on the size of canvas board I wanted to use. I chose 18 x 24cm as it is the biggest I can do that will fit on our scanner - that way I could turn it into "postcards" later.

I used Inktense pencils and water-brushes to add the colour and texture to my painting. This was the first painting that my tree technique actually worked, so I was REALLY happy with it! I then used a fine-liner to add the brick detail and to define the edges of the trees and the tower.

Torwoodlee Tower
18 x 24cm

Please leave a comment below to let me know what you think...


Friday, 28 September 2018

May - Old Gala House, Galashiels Art Exhibition

In May, my mum and I went to the Galashiels Studio Club 70th Anniversary Exhibition. I was amazed how many local artists there were.

Some of the work that I particularly liked was by Lena Scott, Marion Neilson and Iain McCann.


Lena Scott

"Spring Medley" by Lena Scott
Acrylic
I think this painting has incredible detail in the flowers and the use of shadows make them more life-like.  I also love the colours and textures on the leaves and petals.


Marion Neilson

"Teviot in Autumn" by Marion Neilson
Acrylic
I really like the reflections and the light on the trees in this painting because I think it creates a sense of depth and therefore makes it look more realistic.


Iain McCann

"Castle Stalker" by Iain McCann
Pastel
I love the technique used to make the clouds. I think it creates a magical atmosphere around the castle and the reflections add to the effect. 


I'd love to know if any of you have seen these artists' work before - please leave a comment below to let me know what you think of their work...


April/May - SWI Federation Show Prep and competition

This year the Scottish Women's Institute (SWI) Federation Show was in May and I had been asked to do the "flower arranging" part of the community table for the Caddonfoot WI. The theme of the community tables this year was blue and yellow.

There are plenty of yellow flowers available at that time of year but finding blue flowers was much more difficult than I thought.

In April, I did a "practice-run" to show the Caddonfoot WI the sort of thing I had in mind. For this arrangement I just used supermarket flowers. I did two basket arrangements so that Caddonfoot members could choose between the two baskets (round/square).


For the show in May, I used a combination of supermarket flowers, fresh picked greenery from a friend's garden and a few flowers from a florists.


Caddonfoot Community Table

I really enjoyed putting the flower arrangements together and I think the basket was a great way to make it a little unusual. The Caddonfoot community table came 2nd out of 5 entries which was our best ever result.


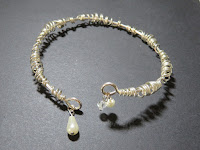
As well as doing the flowers for the community table, I also entered four of the competitions - spring photograph, item of jewellery, pencil drawing, and painting.


I got 3rd prize for both the photo and the pencil drawing.

The next Federation Show is in two years time and I'm looking forward to taking part again.

Please leave a comment below to let me know what you think of any of the above items...

Thursday, 27 September 2018

March - Springwood Park Art Fair 2018

In March, my mum and I went to the Borders Art Fair at Springwood Park near Kelso. It was great seeing so many creative people displaying such a variety of work.

Some of the work I particularly liked was by Denise Playfair, Nev Storer, Marion Neilson and Chris Rose. 

Denise Playfair

Secret Garden - White Hydrangea
Watercolour
Secret Garden - Blue Hydrangea
Watercolour


I love the detail of the petals in these paintings and I think the tiny variations in the colours is incredible.

To see more of Denise Playfair's work go to:
http://www.deniseplayfairart.co.uk/


Nev Storer


I think the way light is used in his paintings is amazing - I'd love to be able to do that in my work!

To see more of Nev Storer's work go to:
http://www.nevillestorer.com/


Marion Neilson


Swan in Sunshine
Mixed Media

I really love this painting - I think the use of colour is incredible and I love the way she has added texture to the painting. I am going to do a separate post on this so I can go into more detail.


Chris Rose

Over the Falls
oil on board
I love all the little details in this painting, particularly the kingfisher flying over the water on the left about halfway up the painting. I think the frothy effect on the rushing water makes this painting look so realistic - I can almost hear the waterfall cascading over the rocks!

One of the highlights of the Springwood visit was getting a copy of Chris Rose's book "In a Natural Light". I plan to do a series of posts about his work, as I find his artwork absolutely stunning.

To see more of Chris Rose's work got to:
http://www.chrisrose-artist.co.uk/


I'd be interested to know if any of you have come across these artists' work and if so, what did you think? Please leave a comment below...


Tuesday, 25 September 2018

February - DIY Upcycled Paint Organiser

After making the drying rack, I wanted to make something to organise my paint tubes, palette knives, etc. and (me being me) I wanted to reuse as much as possible.

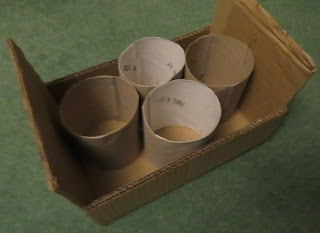
I eventually decided to use cardboard box card and loo-roll tubes to make the organiser.


You will need:
Cardboard box card (strong cardboard is better as lots of paints can get quite heavy)
2 x loo-roll tubes PER POT
Glue gun (and sticks for it)
Ruler
Pencil and pen/marker
Scissors and Stanley knife
Tape

To make the outer container:
I started by choosing 3 pieces of cardboard - one piece about twice the length and width of the others. The long piece will be the base and ends of the organiser. The two smaller pieces will be the sides.

Work out the difference in the length and measure half the difference from each end of the long piece and mark a line across the width at that point. (For example, my long piece was 56cm and the short pieces were 25cm meaning the difference is 31cm so each end is 15.5cm tall.)

Then carefully bend the cardboard along these two lines to create the ends.

Use the glue gun to attach the side piece along the base part of the organiser. Then when the glue has set, glue the ends to the side piece. Repeat for the other side.

To make the "pots":
For EACH pot, I used 2 loo-roll tubes or one kitchen roll tube cut in half (to make two short tubes). I then cut each tube vertically so that the tube opened up. Using some tape, I joined the two tubes together to make a wider tube/pot. (DO NOT STICK IN UNTIL AFTER DECORATING THEM!) Repeat for however many "pots" you want to make.


If I make any more of these organisers, I think I would just make grid dividers as the pots mean that you lose some of the space.

To decorate:
I decided to paint my organiser completely white and then put some "Art Attack" style 'paint splats' dotted around to add some colour. Once the paint on all the pieces had dried, I used my glue gun to securely attach the pots inside the organiser and allowed the glue to set before filling it with my paints, etc.


And there you have it! An upcycled paint organiser!

If any of you give this a go, or have any suggestions or questions, please leave a comment below...


Sunday, 23 September 2018

January - DIY Upcycled Drying Rack

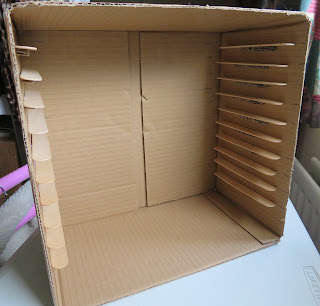
Back in January, I decided to make my own table-top drying rack (suitable for max A4) using a cardboard box, jumbo lolly sticks and wooden skewers.


I made mine hold 10 "shelves/trays" but I think it would work using a taller/longer box (since I turned mine on its end) and having more shelves. (REMEMBER if you're using the 30cm skewers, you MUST make sure the box is slightly wider than that on the inside so that your shelves will slide in easily!)

You will need:
Materials -
1 x cardboard box (strong cardboard)
20 x jumbo lolly sticks (for shelf supports/runners)
5 x jumbo lolly sticks - cut into 4 equal pieces (to stop the trays rising at the back)
10 x 30cm wooden skewers PER TRAY

Equipment - 
Ruler
Pencil
Strong knife (e.g. Stanley knife)
Cutting mat
Glue gun (and glue sticks for it)
Sandpaper/cheap nail file

Here's how I did it:

I started by using a knife to cut off the box flaps (make sure you keep these for later). I then measured and marked where I wanted to put the shelf supports. I made the lines go quite far in from the edge of the box so that I could make sure the shelves were as level as possible.


For the shelf supports:
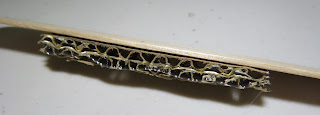
Using some cardboard from the flaps, I cut 20 pieces - about half the length (and width) of the lolly sticks. I then used my glue gun to attach the cardboard strips to the lolly sticks to make the shelf supports more stable.


I then glued the edge of the shelf supports and stuck them so the lolly sticks were on the lines I had measured on the inside of the box.


For the shelf "levellers":
I tried putting in one of the trays but found that the shelf/tray tipped forward. To prevent this, I cut some more jumbo lolly sticks into 4 pieces and smoothed off the corners on one of the short sides (the other side would be glued to the box so there is no risk of splinters, but if the other corners are particularly splintery then you could sand/smooth those off too). I then glued the "levellers" slightly above the shelf supports so that the trays would slide in easily but still be kept level.


For the trays:
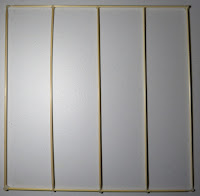
For EACH tray/shelf, I used 10 wooden skewers - 4 for the outside frame and the other 6 to make a grid.

I started by taking 2 skewers and gluing the flat ends together at right angles. Repeat this with another two skewers to make the opposite corner. I also strengthened the flat-end corners with more glue - this part is fiddly because the hot glue re-melts the glue that is already there. When the glue was set, I glued the pointy ends together to make the square frame.


I then measured and marked where I would glue the remaining skewers. Since I was using 30cm skewers, I measured and marked 7.5cm, 15cm and 22.5cm on all 4 sides of the frame.


After gluing the cross-bars to the frame, I also glued 3 of the parts where the skewers crossed (on a diagonal from the corners e.g. bottom left, middle centre, top right) to make sure the cross-bars stayed in place.

Repeat this for however many shelves/trays you need, then slide them into the box using the shelf supports and levellers.


And there you have it! A table-top drying rack ready to use!

If any of you try this for yourselves, please leave a comment to let me know how you got on...