
I made mine hold 10 "shelves/trays" but I think it would work using a taller/longer box (since I turned mine on its end) and having more shelves. (REMEMBER if you're using the 30cm skewers, you MUST make sure the box is slightly wider than that on the inside so that your shelves will slide in easily!)
You will need:
Materials -
1 x cardboard box (strong cardboard)
20 x jumbo lolly sticks (for shelf supports/runners)
5 x jumbo lolly sticks - cut into 4 equal pieces (to stop the trays rising at the back)
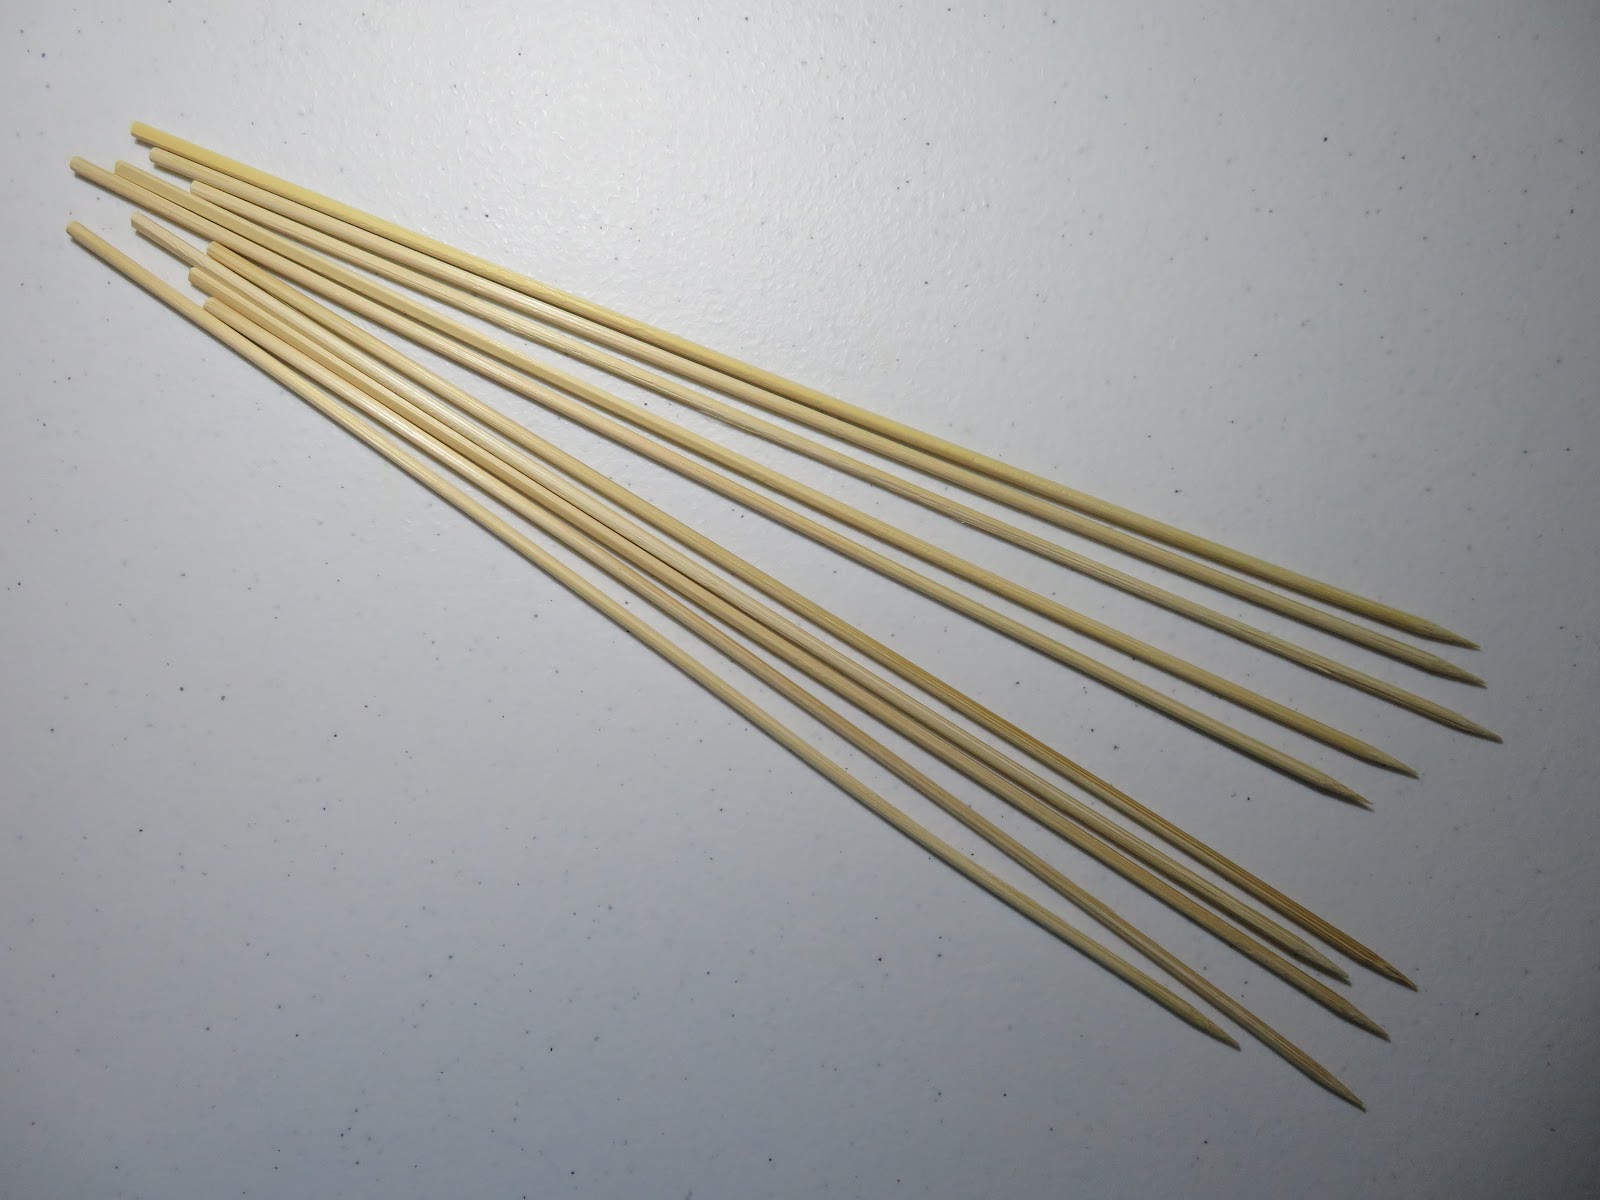
10 x 30cm wooden skewers PER TRAY
Equipment -
Ruler
Pencil
Strong knife (e.g. Stanley knife)
Cutting mat
Glue gun (and glue sticks for it)Sandpaper/cheap nail file
Here's how I did it:
I started by using a knife to cut off the box flaps (make sure you keep these for later). I then measured and marked where I wanted to put the shelf supports. I made the lines go quite far in from the edge of the box so that I could make sure the shelves were as level as possible.


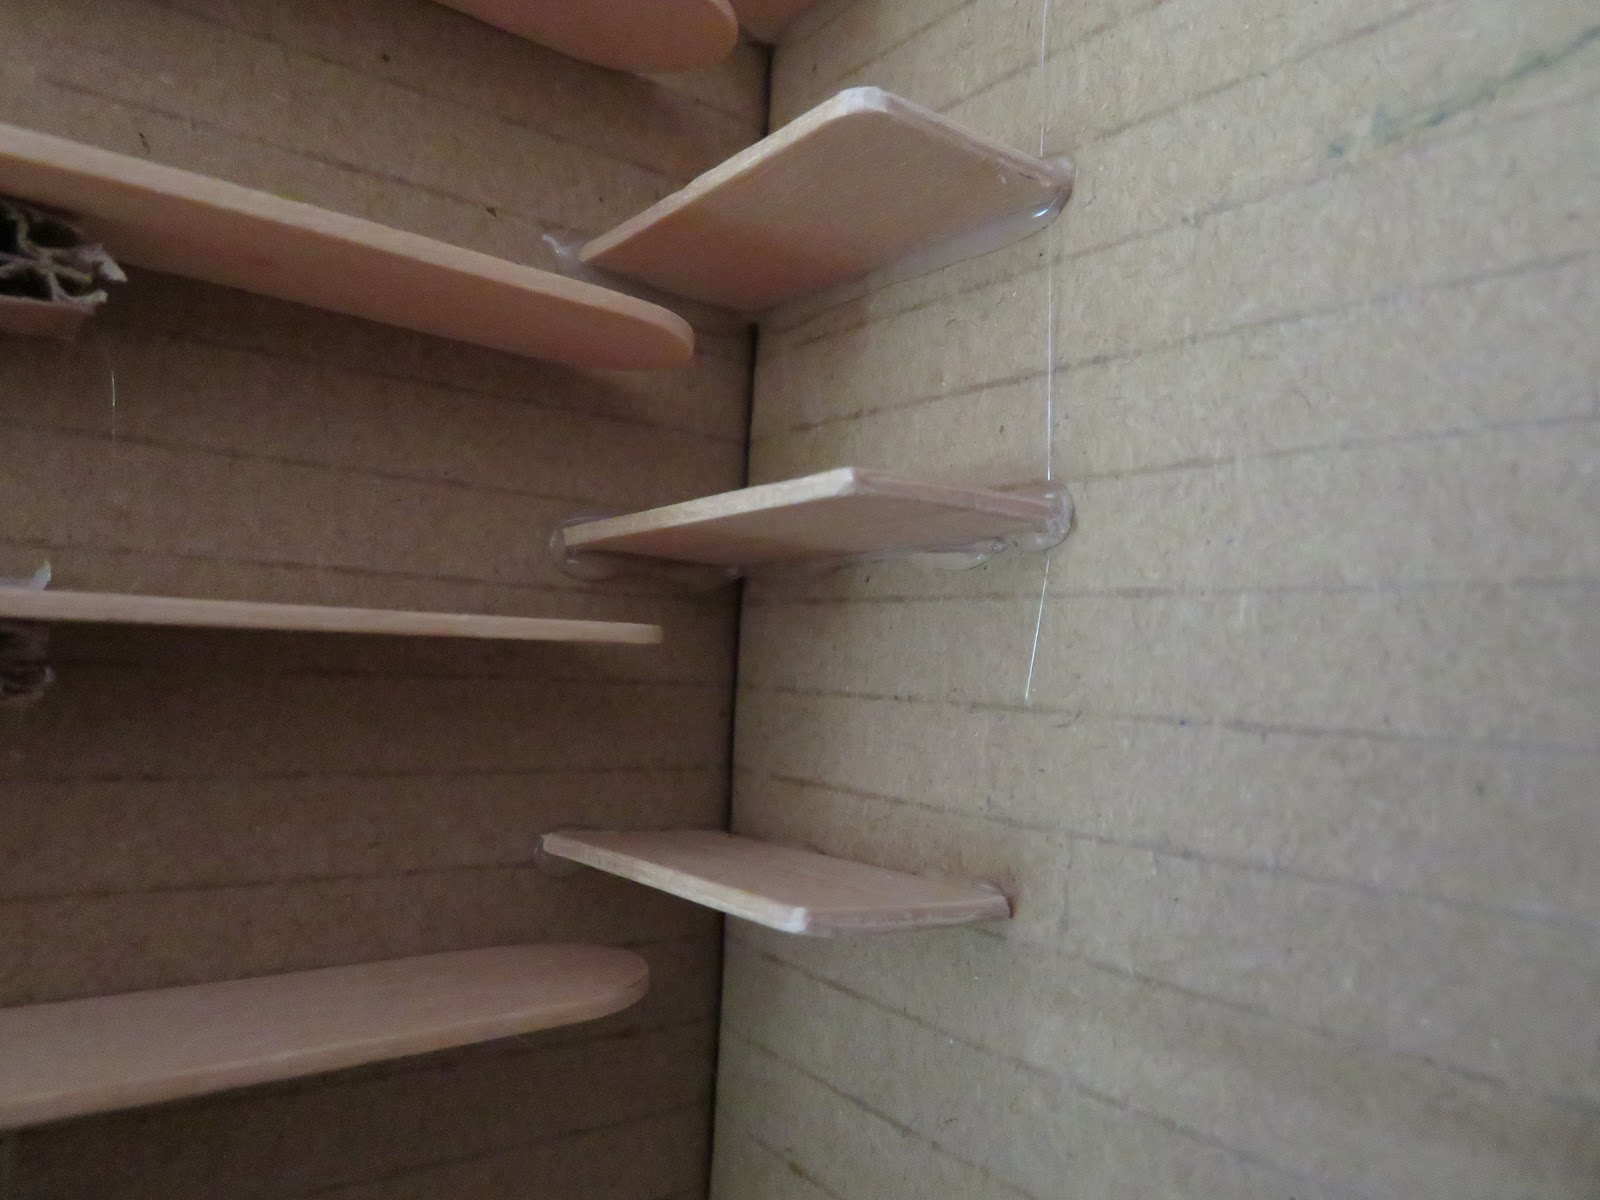
For the shelf supports:
Using some cardboard from the flaps, I cut 20 pieces - about half the length (and width) of the lolly sticks. I then used my glue gun to attach the cardboard strips to the lolly sticks to make the shelf supports more stable.
Using some cardboard from the flaps, I cut 20 pieces - about half the length (and width) of the lolly sticks. I then used my glue gun to attach the cardboard strips to the lolly sticks to make the shelf supports more stable.


I then glued the edge of the shelf supports and stuck them so the lolly sticks were on the lines I had measured on the inside of the box.


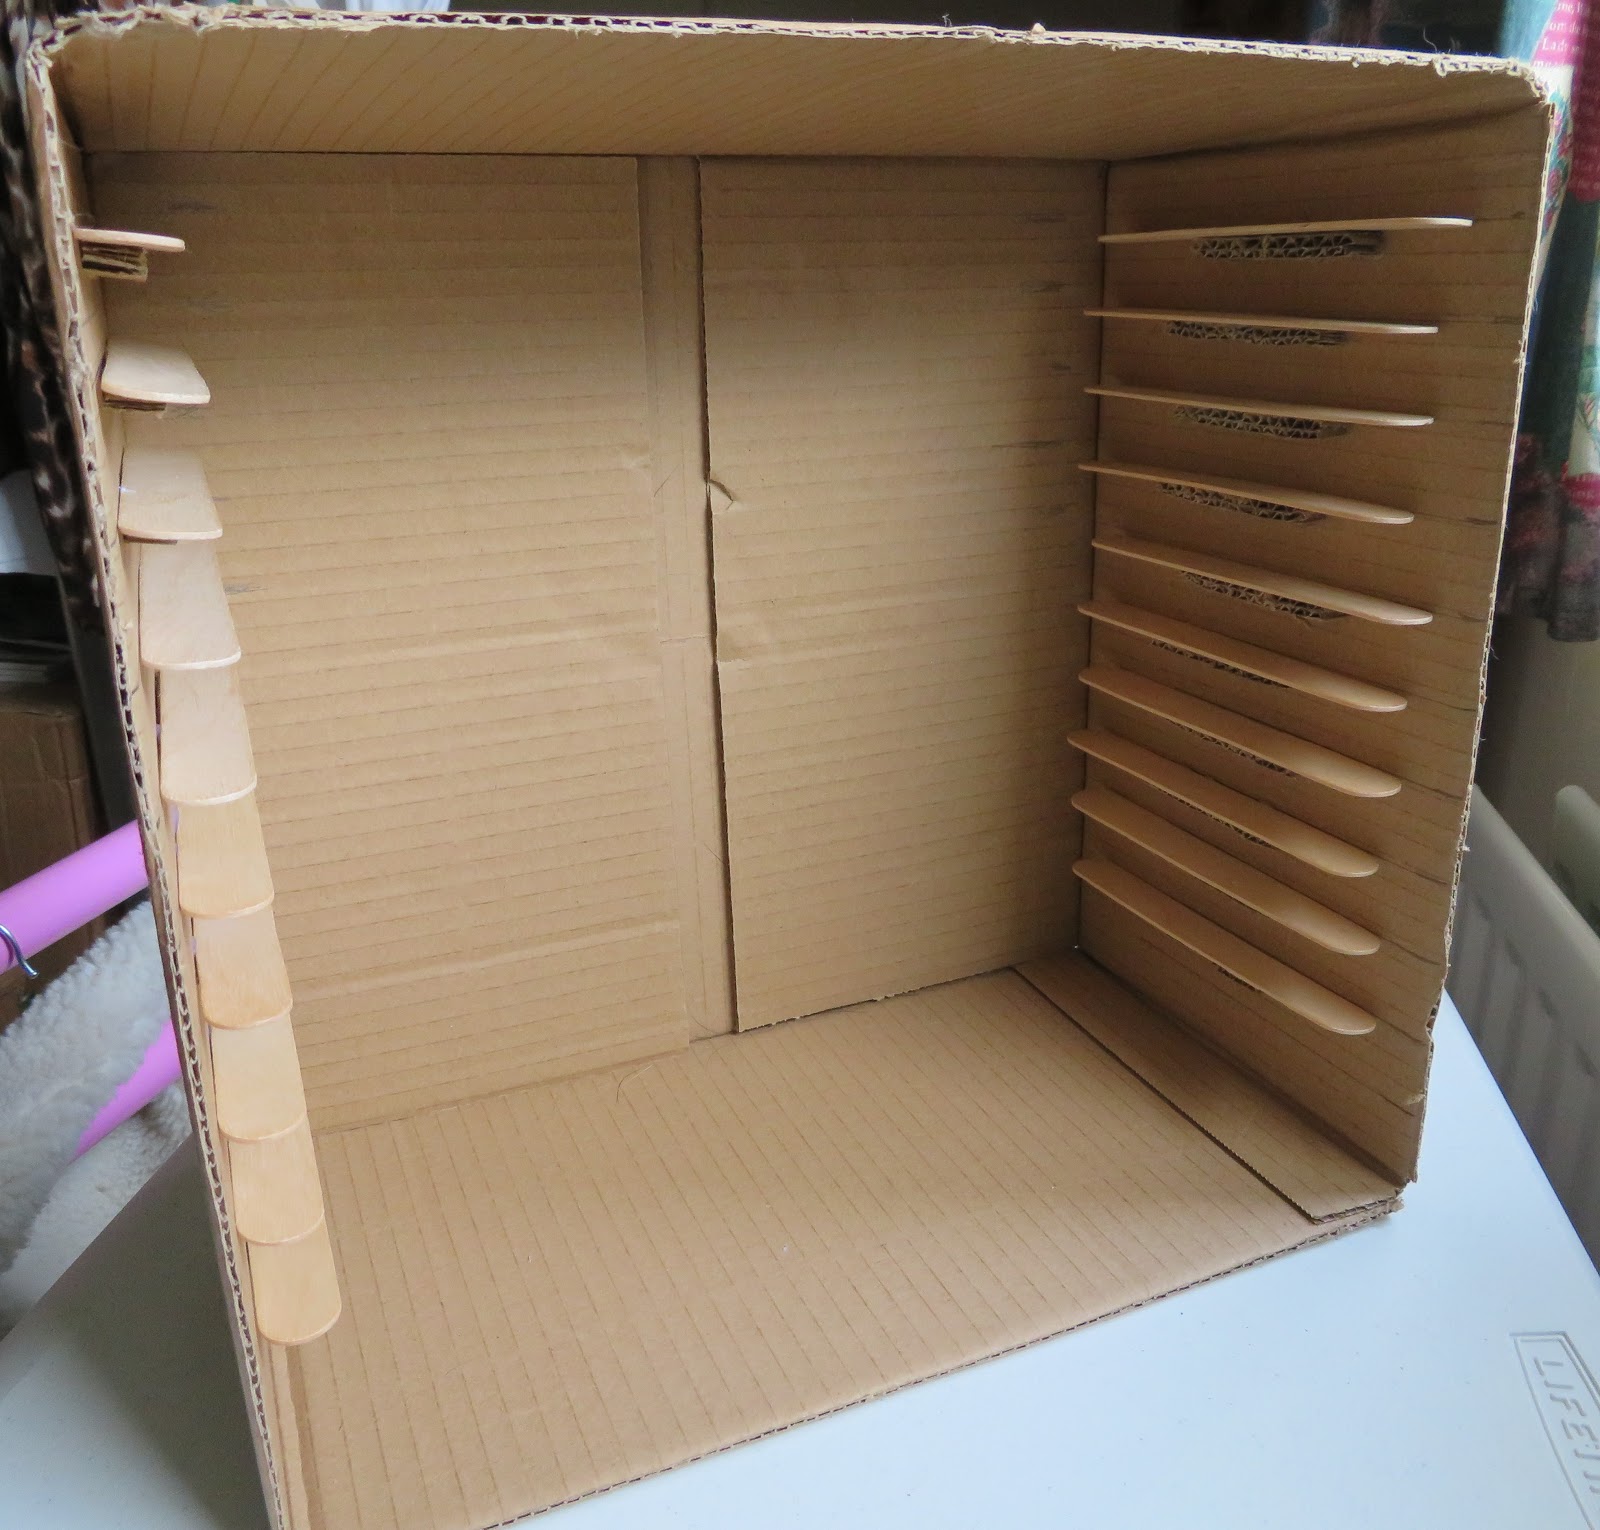

For the shelf "levellers":
I tried putting in one of the trays but found that the shelf/tray tipped forward. To prevent this, I cut some more jumbo lolly sticks into 4 pieces and smoothed off the corners on one of the short sides (the other side would be glued to the box so there is no risk of splinters, but if the other corners are particularly splintery then you could sand/smooth those off too). I then glued the "levellers" slightly above the shelf supports so that the trays would slide in easily but still be kept level.


For the trays:
For EACH tray/shelf, I used 10 wooden skewers - 4 for the outside frame and the other 6 to make a grid.


I then measured and marked where I would glue the remaining skewers. Since I was using 30cm skewers, I measured and marked 7.5cm, 15cm and 22.5cm on all 4 sides of the frame.
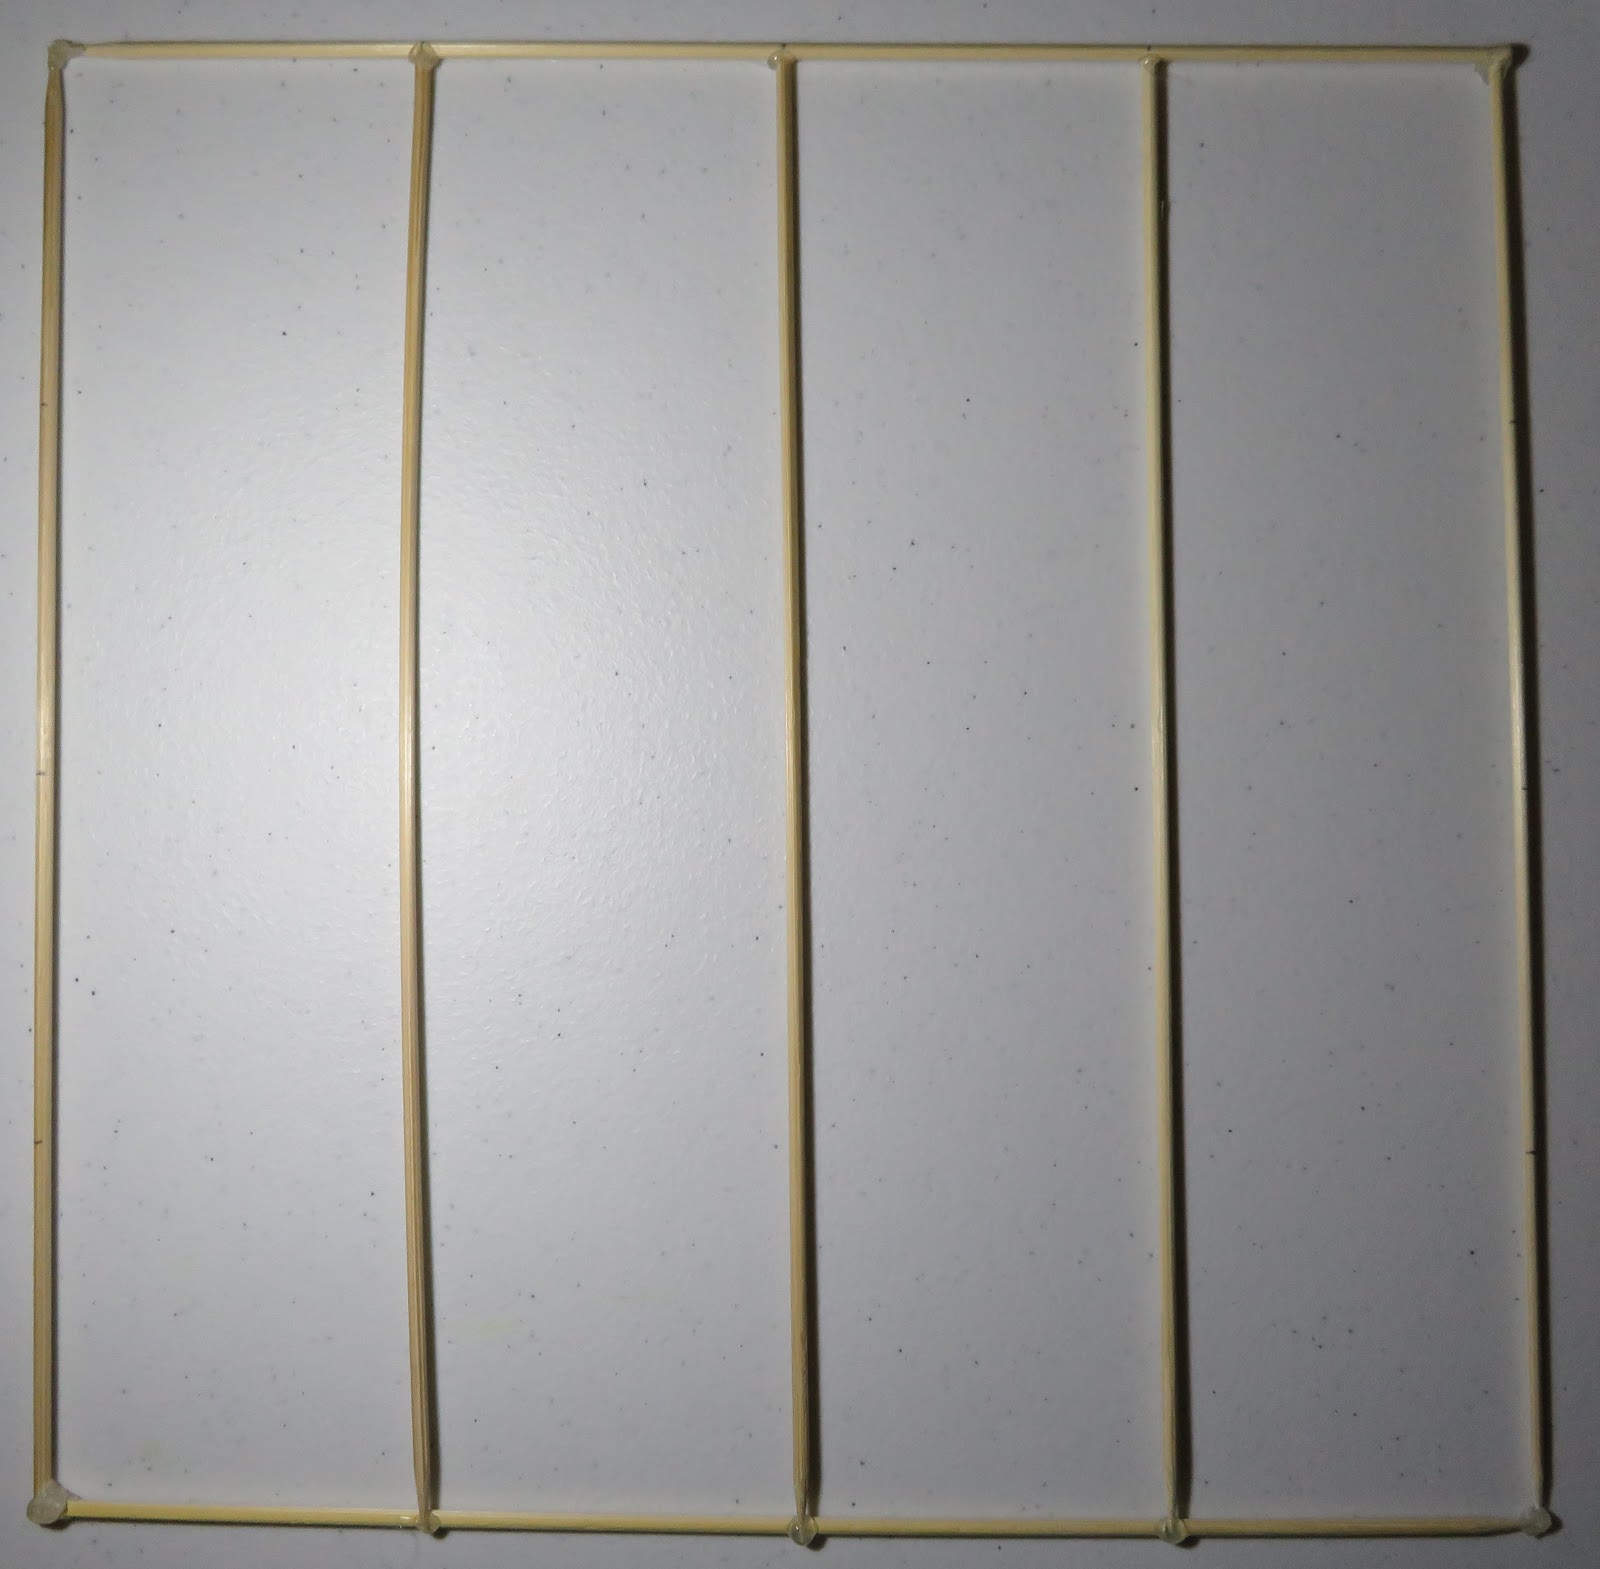

After gluing the cross-bars to the frame, I also glued 3 of the parts where the skewers crossed (on a diagonal from the corners e.g. bottom left, middle centre, top right) to make sure the cross-bars stayed in place.
Repeat this for however many shelves/trays you need, then slide them into the box using the shelf supports and levellers.

And there you have it! A table-top drying rack ready to use!
If any of you try this for yourselves, please leave a comment to let me know how you got on...
No comments:
Post a Comment