Thursday, 27 September 2018

March - Springwood Park Art Fair 2018

In March, my mum and I went to the Borders Art Fair at Springwood Park near Kelso. It was great seeing so many creative people displaying such a variety of work.

Some of the work I particularly liked was by Denise Playfair, Nev Storer, Marion Neilson and Chris Rose. 

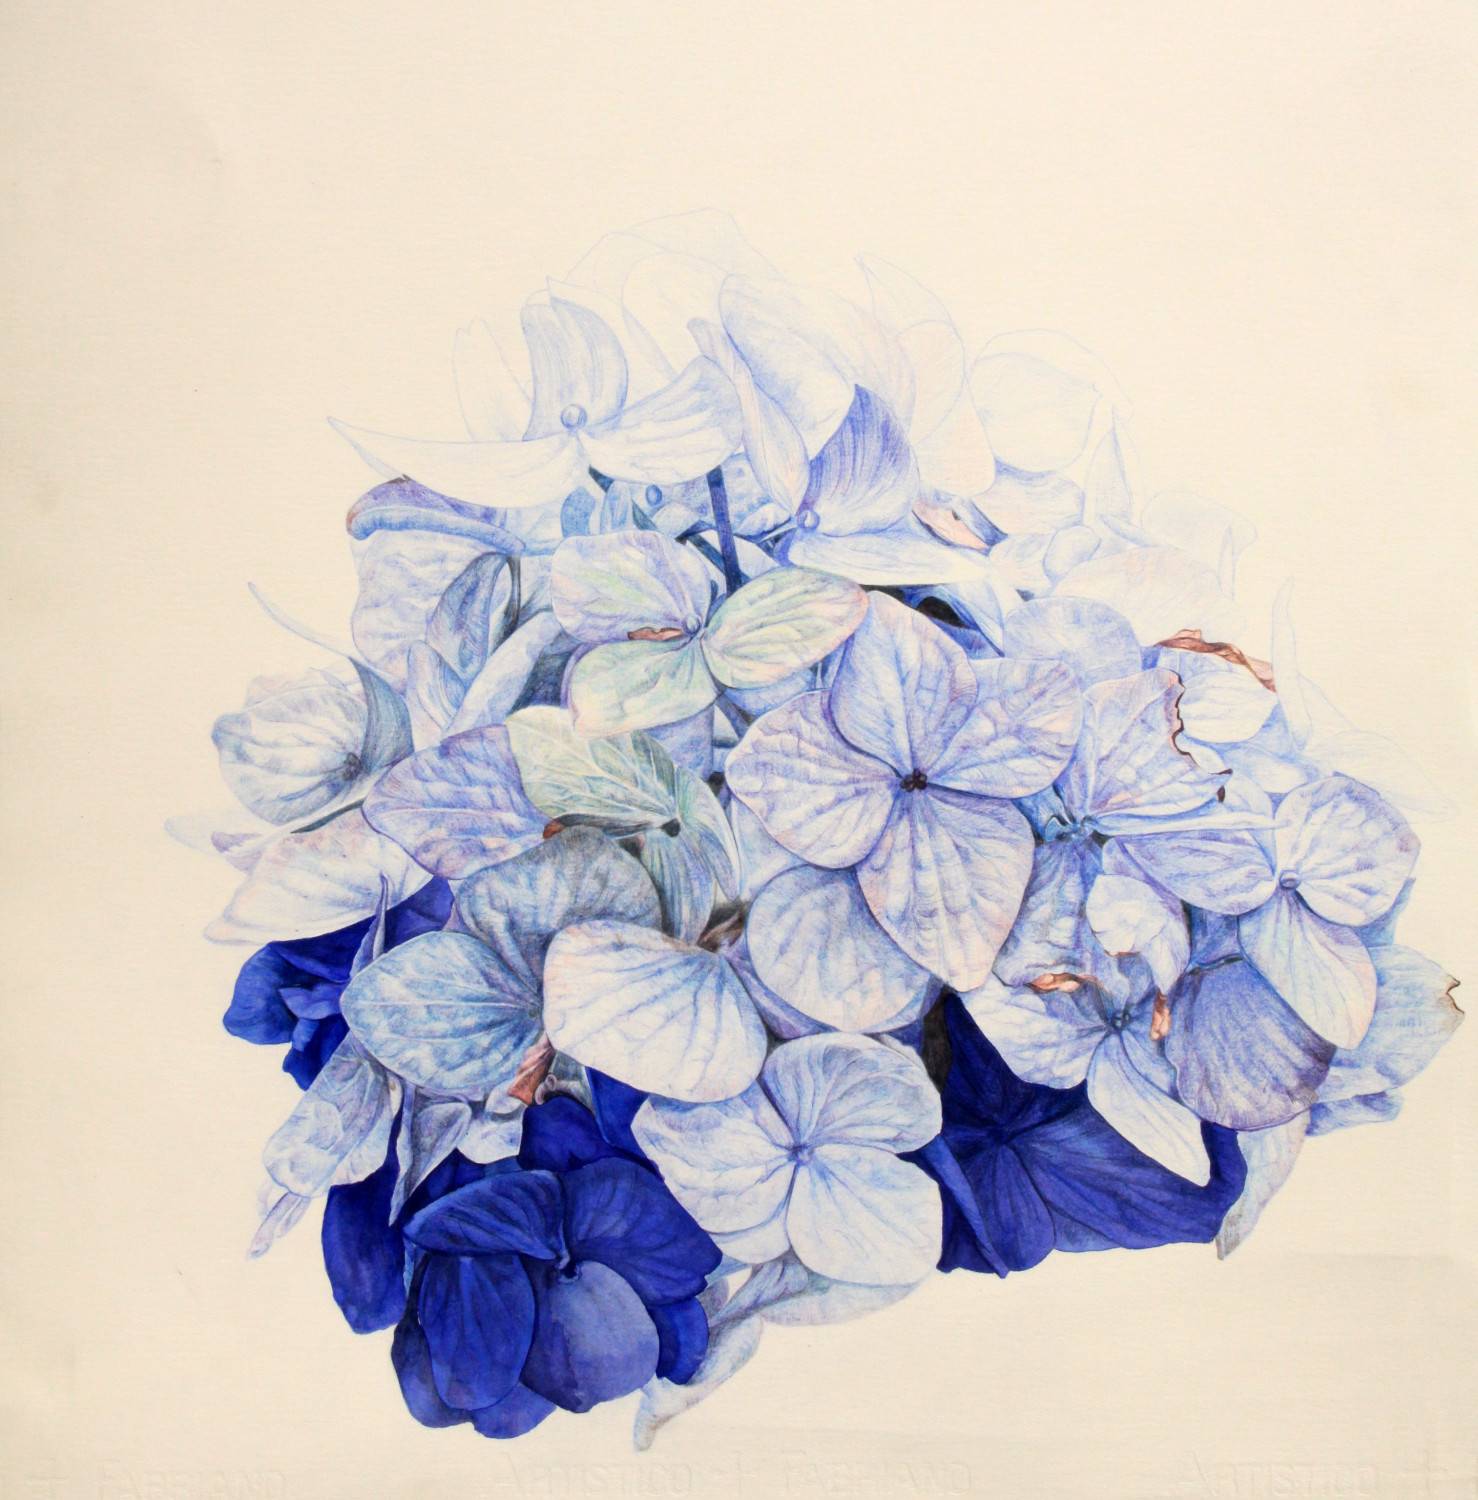
Denise Playfair

Secret Garden - White Hydrangea
Watercolour
Secret Garden - Blue Hydrangea
Watercolour


I love the detail of the petals in these paintings and I think the tiny variations in the colours is incredible.

To see more of Denise Playfair's work go to:
http://www.deniseplayfairart.co.uk/


Nev Storer


I think the way light is used in his paintings is amazing - I'd love to be able to do that in my work!

To see more of Nev Storer's work go to:
http://www.nevillestorer.com/


Marion Neilson


Swan in Sunshine
Mixed Media

I really love this painting - I think the use of colour is incredible and I love the way she has added texture to the painting. I am going to do a separate post on this so I can go into more detail.


Chris Rose

Over the Falls
oil on board
I love all the little details in this painting, particularly the kingfisher flying over the water on the left about halfway up the painting. I think the frothy effect on the rushing water makes this painting look so realistic - I can almost hear the waterfall cascading over the rocks!

One of the highlights of the Springwood visit was getting a copy of Chris Rose's book "In a Natural Light". I plan to do a series of posts about his work, as I find his artwork absolutely stunning.

To see more of Chris Rose's work got to:
http://www.chrisrose-artist.co.uk/


I'd be interested to know if any of you have come across these artists' work and if so, what did you think? Please leave a comment below...


Tuesday, 25 September 2018

February - DIY Upcycled Paint Organiser

After making the drying rack, I wanted to make something to organise my paint tubes, palette knives, etc. and (me being me) I wanted to reuse as much as possible.

I eventually decided to use cardboard box card and loo-roll tubes to make the organiser.


You will need:
Cardboard box card (strong cardboard is better as lots of paints can get quite heavy)
2 x loo-roll tubes PER POT
Glue gun (and sticks for it)
Ruler
Pencil and pen/marker
Scissors and Stanley knife
Tape

To make the outer container:
I started by choosing 3 pieces of cardboard - one piece about twice the length and width of the others. The long piece will be the base and ends of the organiser. The two smaller pieces will be the sides.

Work out the difference in the length and measure half the difference from each end of the long piece and mark a line across the width at that point. (For example, my long piece was 56cm and the short pieces were 25cm meaning the difference is 31cm so each end is 15.5cm tall.)

Then carefully bend the cardboard along these two lines to create the ends.

Use the glue gun to attach the side piece along the base part of the organiser. Then when the glue has set, glue the ends to the side piece. Repeat for the other side.

To make the "pots":
For EACH pot, I used 2 loo-roll tubes or one kitchen roll tube cut in half (to make two short tubes). I then cut each tube vertically so that the tube opened up. Using some tape, I joined the two tubes together to make a wider tube/pot. (DO NOT STICK IN UNTIL AFTER DECORATING THEM!) Repeat for however many "pots" you want to make.


If I make any more of these organisers, I think I would just make grid dividers as the pots mean that you lose some of the space.

To decorate:
I decided to paint my organiser completely white and then put some "Art Attack" style 'paint splats' dotted around to add some colour. Once the paint on all the pieces had dried, I used my glue gun to securely attach the pots inside the organiser and allowed the glue to set before filling it with my paints, etc.


And there you have it! An upcycled paint organiser!

If any of you give this a go, or have any suggestions or questions, please leave a comment below...


Sunday, 23 September 2018

January - DIY Upcycled Drying Rack

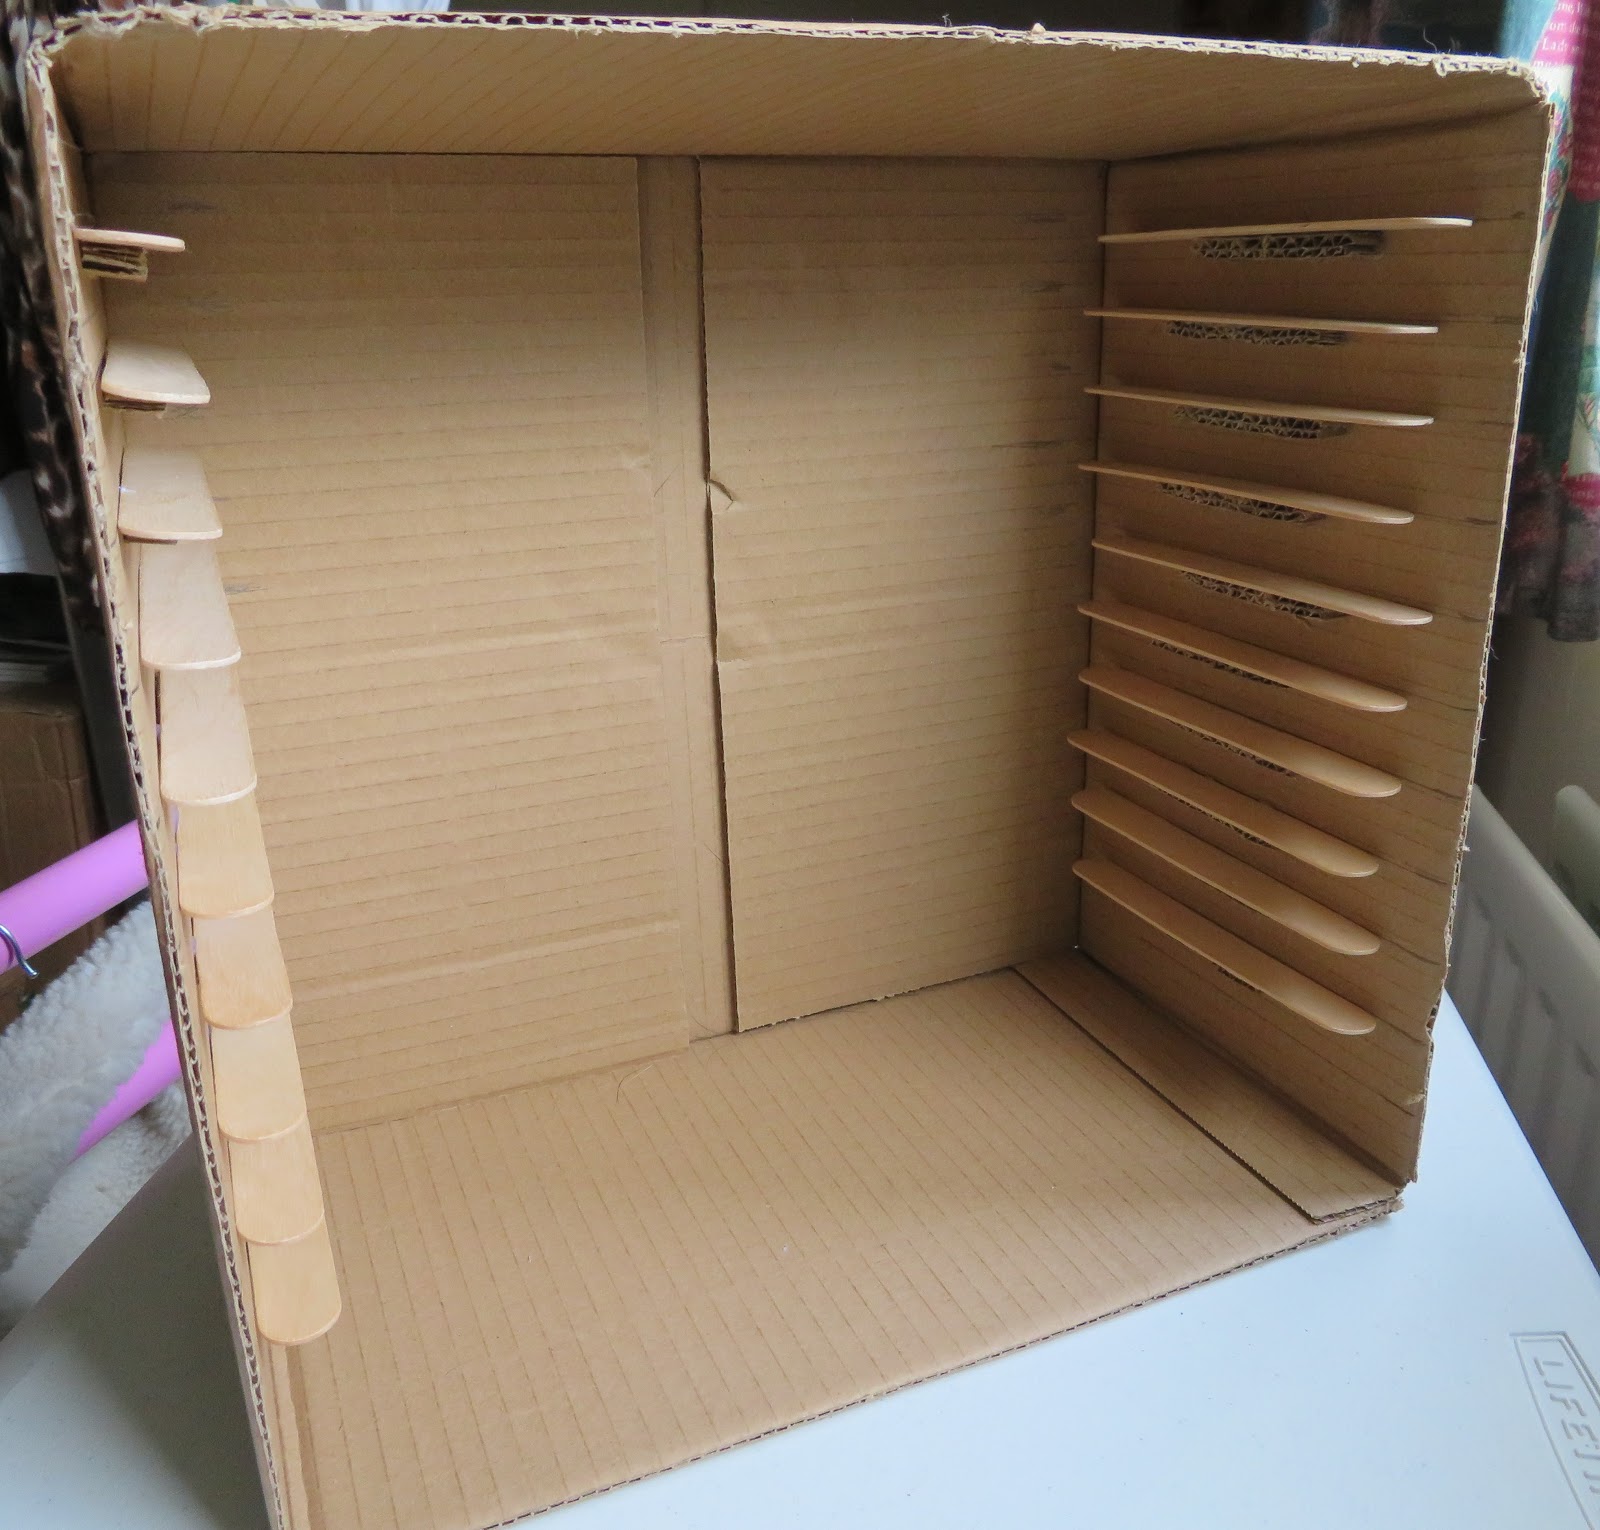
Back in January, I decided to make my own table-top drying rack (suitable for max A4) using a cardboard box, jumbo lolly sticks and wooden skewers.


I made mine hold 10 "shelves/trays" but I think it would work using a taller/longer box (since I turned mine on its end) and having more shelves. (REMEMBER if you're using the 30cm skewers, you MUST make sure the box is slightly wider than that on the inside so that your shelves will slide in easily!)

You will need:
Materials -
1 x cardboard box (strong cardboard)
20 x jumbo lolly sticks (for shelf supports/runners)
5 x jumbo lolly sticks - cut into 4 equal pieces (to stop the trays rising at the back)
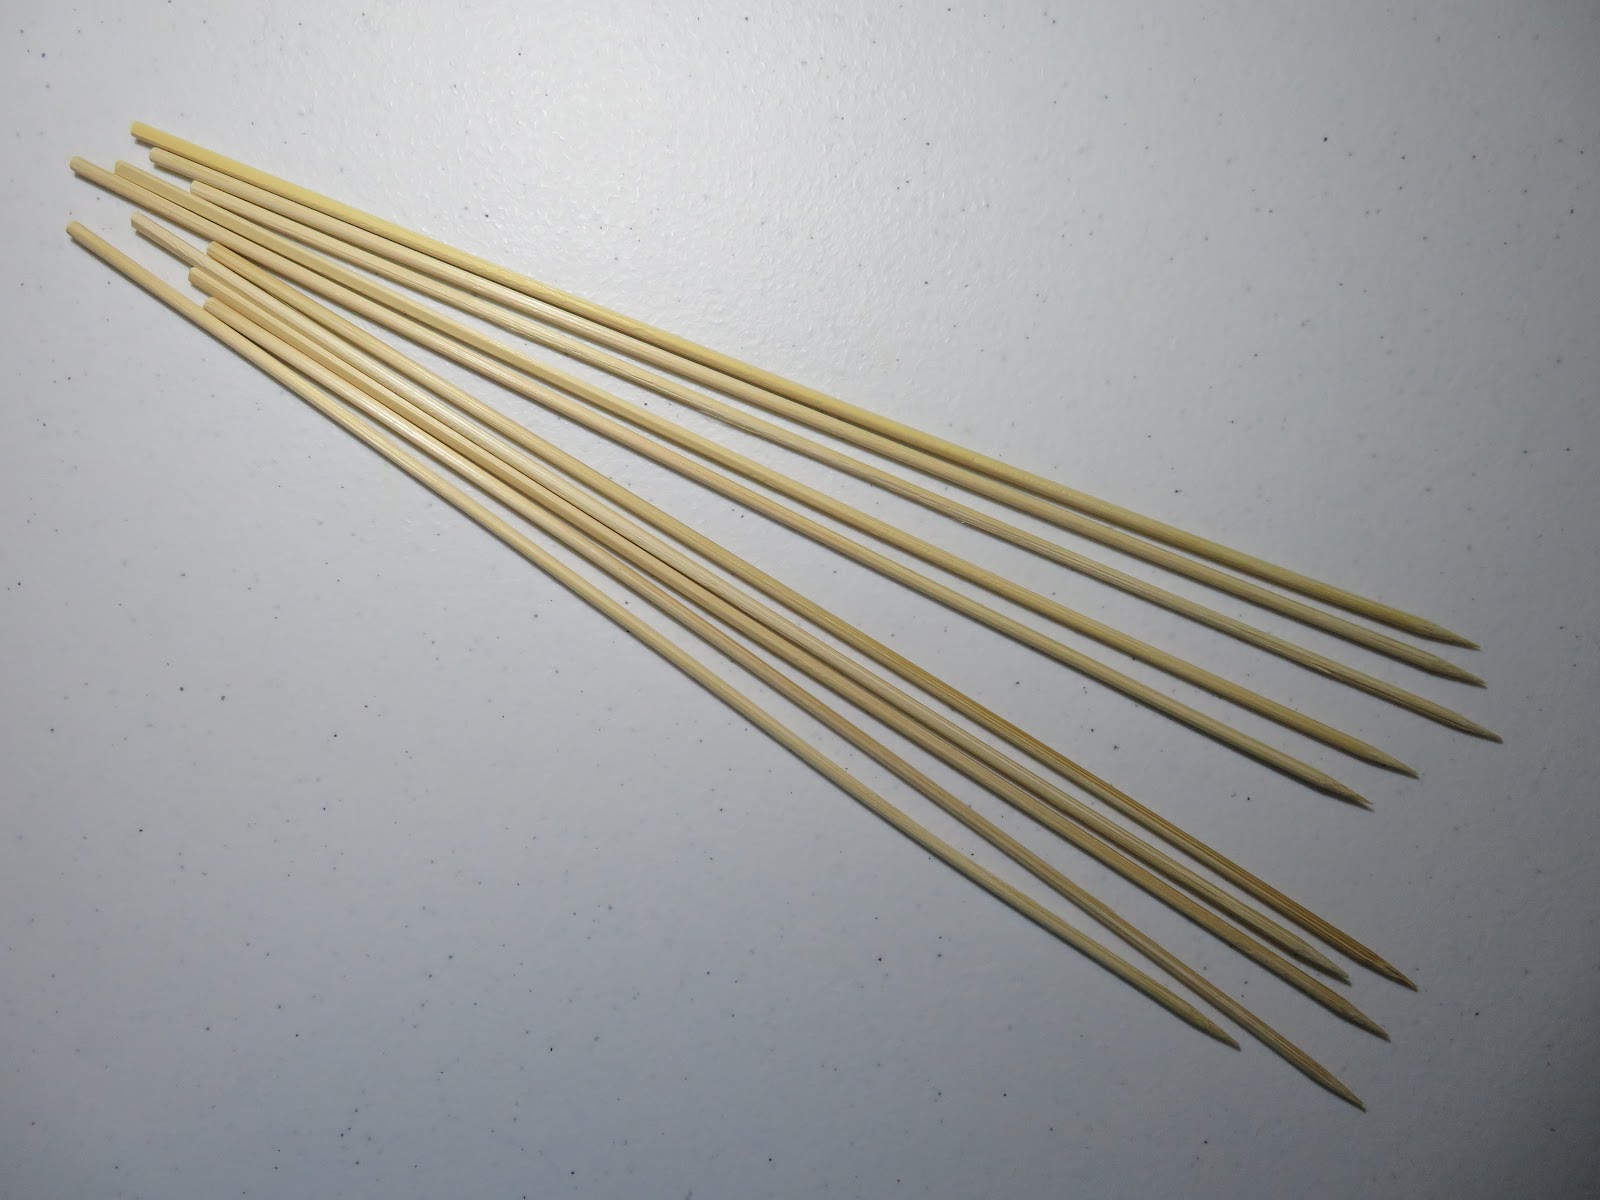
10 x 30cm wooden skewers PER TRAY

Equipment - 
Ruler
Pencil
Strong knife (e.g. Stanley knife)
Cutting mat
Glue gun (and glue sticks for it)
Sandpaper/cheap nail file

Here's how I did it:

I started by using a knife to cut off the box flaps (make sure you keep these for later). I then measured and marked where I wanted to put the shelf supports. I made the lines go quite far in from the edge of the box so that I could make sure the shelves were as level as possible.


For the shelf supports:
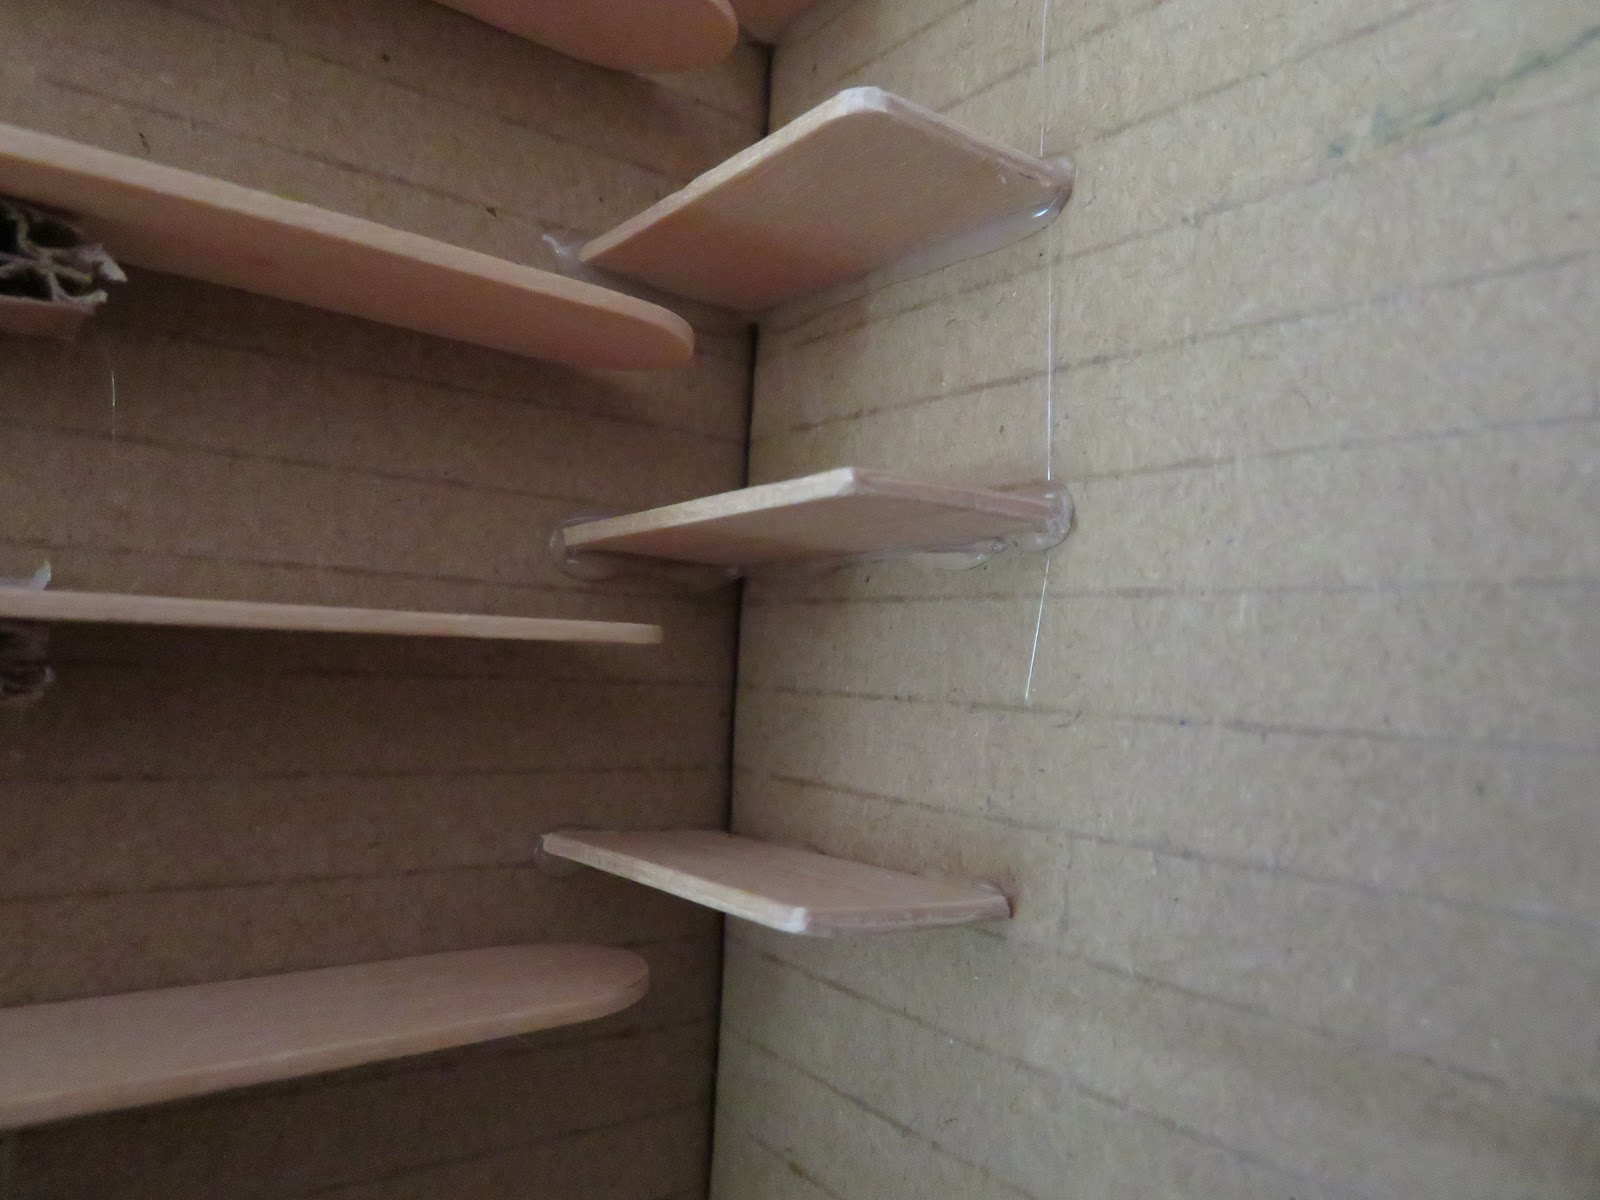
Using some cardboard from the flaps, I cut 20 pieces - about half the length (and width) of the lolly sticks. I then used my glue gun to attach the cardboard strips to the lolly sticks to make the shelf supports more stable.


I then glued the edge of the shelf supports and stuck them so the lolly sticks were on the lines I had measured on the inside of the box.


For the shelf "levellers":
I tried putting in one of the trays but found that the shelf/tray tipped forward. To prevent this, I cut some more jumbo lolly sticks into 4 pieces and smoothed off the corners on one of the short sides (the other side would be glued to the box so there is no risk of splinters, but if the other corners are particularly splintery then you could sand/smooth those off too). I then glued the "levellers" slightly above the shelf supports so that the trays would slide in easily but still be kept level.


For the trays:
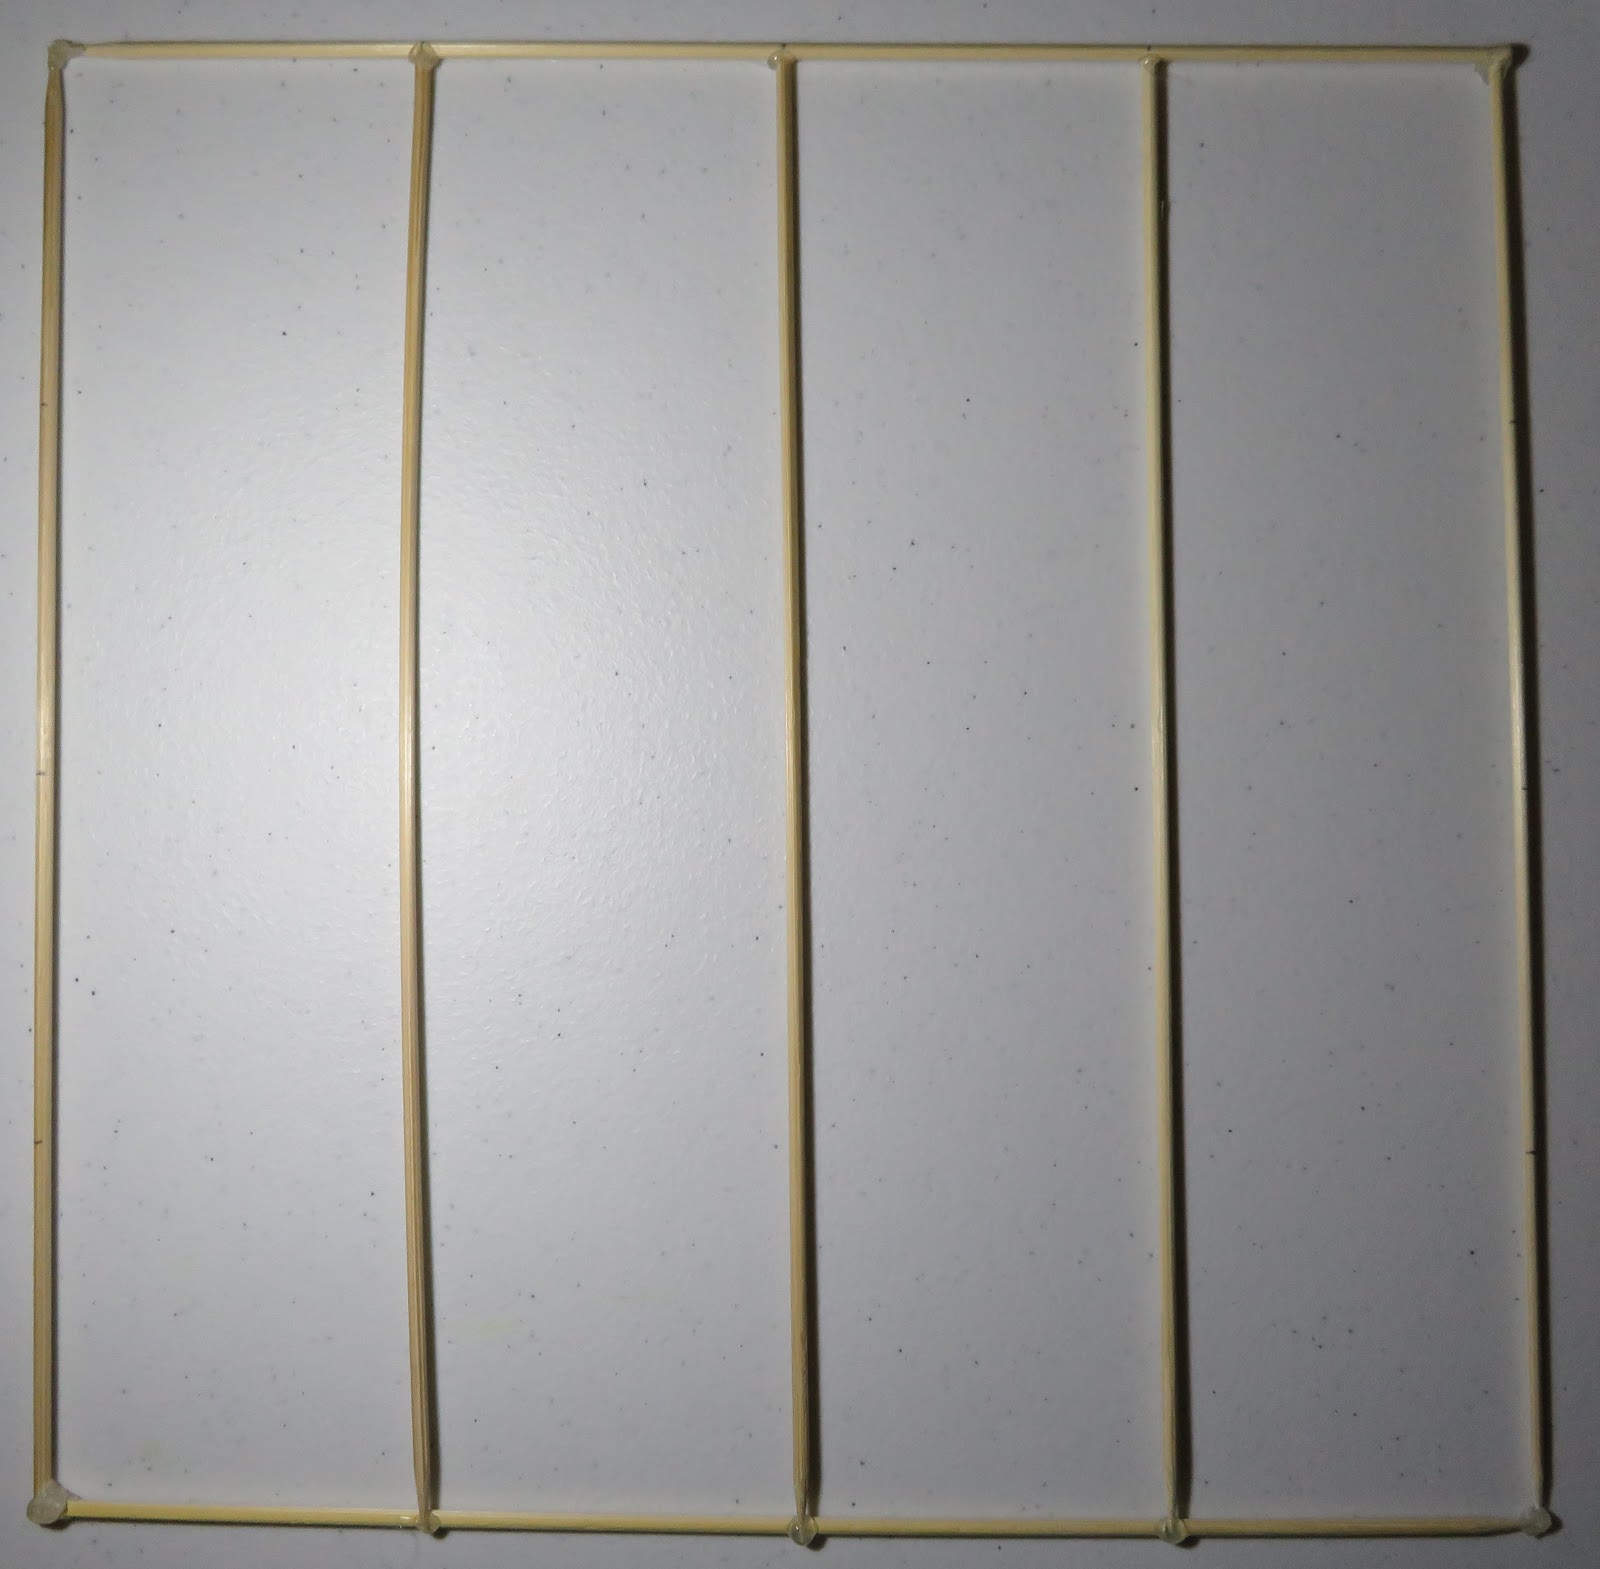
For EACH tray/shelf, I used 10 wooden skewers - 4 for the outside frame and the other 6 to make a grid.

I started by taking 2 skewers and gluing the flat ends together at right angles. Repeat this with another two skewers to make the opposite corner. I also strengthened the flat-end corners with more glue - this part is fiddly because the hot glue re-melts the glue that is already there. When the glue was set, I glued the pointy ends together to make the square frame.


I then measured and marked where I would glue the remaining skewers. Since I was using 30cm skewers, I measured and marked 7.5cm, 15cm and 22.5cm on all 4 sides of the frame.


After gluing the cross-bars to the frame, I also glued 3 of the parts where the skewers crossed (on a diagonal from the corners e.g. bottom left, middle centre, top right) to make sure the cross-bars stayed in place.

Repeat this for however many shelves/trays you need, then slide them into the box using the shelf supports and levellers.


And there you have it! A table-top drying rack ready to use!

If any of you try this for yourselves, please leave a comment to let me know how you got on...

Sunday, 16 September 2018

Decisions, decisions...

For months now, (that was supposed to say 'weeks' - at most), I've been trying to decide how to do a "catch-up" post but now it has been over six months(!!!) and I think it would be too much for one post.

So I decided to do a series of "Throwback Thursday" type posts - although they might not all be on Thursdays!

And on that note , let's get started!


Monday, 29 January 2018

Advent Calendar 2017

I have been meaning to post this for the last 8 weeks but better late than never, I guess...

At each of the monthly SWI (Scottish Women's Institute) meetings, there are two competitions - made by member (MBM) and pick-up (PU). For December (2017), the MBM was an Advent Calendar.

I had a few ideas for what I wanted to do for my advent calendar (e.g. use toilet roll tubes and have drawers with different activities/crafts each day) but I wasn't sure how to put it all together.

Eventually, after a lot of discussion, I chose to use cardboard (from some cardboard boxes) to construct my advent calendar. I also decided to make the calendar in a sort of book form using the cardboard from a bedsheet.


I started by measuring the cardboard for the "cover", to find out how much space I had for each door. I wanted to have 25 doors as advent calendars usually only have 24 doors and I get disappointed on Christmas Day when I don't have another door to open - but maybe that's just me?

After measuring everything and working out how I was going to make the "grid" for each side of the "book", I had to measure and cut 99 pieces of cardboard - so, including the "cover", there are 100 pieces of cardboard in my advent calendar!


I then used my glue gun to put together the two grids and the part for the 25th door. Before I could attach them to the "cover" though, I had to cover the "cover" so that it wasn't just plain cardboard - I decided to use self-adhesive sparkly blue 'PVC film'. I also had to decide what I was going to do for the background of the grids, the back/inside of the doors, the daily activities/crafts and the overall design for the calendar.

For the backgrounds of the grids, I thought about using Christmas song/carol titles so that you would spend each day with a different song/carol stuck in your head. However, after discussing it with my family, I decided to make a game out of it by only using part of the lyrics so you have to guess which song it is from and then on the 25th there is a scroll with all the answers on it. I think this is a really fun idea and, thanks to my terrible memory, I can't remember which songs I used, so I can still enjoy the game even though I'm the one who chose the songs!


I remember having an advent calendar one year which had Christmas jokes on the inside of each of the doors and I really liked this idea. So I researched as many Christmas jokes as I could find - I think I read about 150 jokes most of which were the same handful or a slight variation of them. Eventually though, I found the 25 jokes I wanted to use.


For the daily activities and crafts, I found a few different "Christmas Bucket Lists" and chose the things I wanted to do e.g. make paper snowflakes, help decorate the house/tree, help wrap presents, bake gingerbread biscuits, start a new tradition, etc.


The overall design for the calendar probably took me the longest (2nd only to the amount of time it took me to measure and cut the cardboard!). I knew I wanted to have a fun Christmassy theme/look and after some discussion, I decided to paint each door to look like a gingerbread house with either a red or a green door. The 25th door was taller and much thinner than the other doors so I decided to do a Narnia-style lamppost instead. I took all the doors out and spray-painted the grids silver to make them look sort of icy/wintery.


By this point I was running out of time before the meeting so I typed and printed the backgrounds, jokes and activities and used the guillotine to cut them to the correct sizes. For the door 'handles' I used a paper fastener/split pin pushed through the cardboard. I then attached the joke to the door which also helped keep the fasteners in place. I used my glue gun to attach the grids to the lyric backgrounds and then to the inside of the book cover. To make it easier to get the activity cards in and out, I folded a corner on each one. I tried to link some of the activities with the lyrics behind them but couldn't do this with all of them.


In order to keep the advent calendar closed when not in use, I got three pieces of thin ribbon (two white, one red) and plaited them. I then attached one end of the plait to the advent calendar by wrapping it around the head of the paper fastener/split pin on the front cover and then taking the other end across the opening and wrapping it around the fastener on the back cover.


I'd love to hear any feedback you have in the comments below. I hope you all had a great Christmas and New Year -  all the best for 2018!